Creating Metadata
The Data Catalog service allows users to create various types of metadata on their own, as a supplement to synchronized data, to make metadata content richer, ensure data consistency, and improve data usage flexibility. For details on data sync, see Synchronizing Data Assets.
You can create metadata on the following pages:
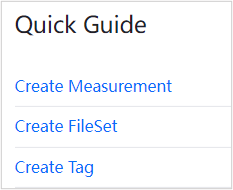
Using the Data Asset Explorer Function, you can create metadata using the Creation Guide on the left side of the homepage.
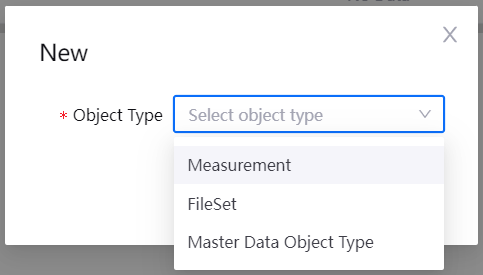
If you have used the object statistics link on the right side of the search or Data Asset Explorer function homepage to reach the Data Asset Explorer results page, click New/Import Object > New Object to create metadata.
This tutorial, using the creation of metadata in the Creation Guide as an example, will show you how to create various types of metadata.
Creating a Measurement
You can create a new measurement in the Data Catalog. Measurements represent the numerical information of the data, and are usually used to carry the numerical value of the measurement point.
There are two sources of measurements:
- You can synchronize measurement points by accessing the platform equipment model. For more on synchronizing measurement point data, see Creating a System Sync Task.
- Creating on your own in the Data Catalog
- Log in to the EnOS Management Console and select Data Catalog from the left navigation bar.
- Under the left side of the Data Asset Explorer page, find the Creation Guide, and then click Create Measurement.
- On the Create Measurement page, enter or select the following information:
- ID: enter the Measurement ID, which must be unique in the current OU
- Name: enter the name of the measurement
- Data Type: select a measurement data type
- Unit: enter the unit of measurement
- Description: enter a description of the measurement, no more than 200 characters
- Click OK to create the measurement.
Creating a Hive Table
Through the Data Catalog, you can create new Hive tables.
There are two sources of Hive tables:
- You can synchronize Hive tables using EnOS Hive Sync. See Creating a System Sync Task.
- Creating on your own in the Data Catalog
- Log in to the EnOS Management Console and select Data Catalog from the left navigation bar.
- Under the left side of the Data Asset Explorer page, find the Creation Guide, and then click Create Hive Table.
- On the Create Hive Table, you can create a Hive table in the following ways:
- Create by entering the information
- Create by DDL (Data Definition Language)
Create by entering the information:
Table Name: the name of the Hive table
External Table: tick whether it is an external table.
Note
The data life cycle of external tables is not controlled by Hive, and data can be shared with other external tables. When an internal table is deleted, the files under the corresponding HDFS path will be deleted; when an external table is deleted, the files under the corresponding HDFS path will not be deleted.
File Type: select the Hive table file type
Column Separator: select the Hive table column separator
Encoding Method: select the Hive table encoding method
Save Path: This item is only required when the “Yes” form is ticked. Enter the save path after the default path prefix, which must start with
/.Description: description of the Hive table
Columns: Click Add, then enter or select the following information:
- Name: enter the column name, which must be unique in the current Hive table
- Type: select the data type
- Description: enter a description of the column, no more than 200 characters
- Click Partition
 to add this field as a partition field
 - Partition: show partition field
Click OK to create the Hive table.
Create by Data Definition Language
Click Switch to Data Definition Language > OK in the upper right corner
Entering the relevant DDL sentence
Click Grammar Check in the upper right corner to check the grammar of the table statement
Click Format Statement in the upper right corner to format the table statement

Click OK to create the Hive table.
Creating a FileSet
Using the Data Catalog, you can create a new FileSet. FileSet uses a fixed pattern to describe a collection of a series of files.
- Log in to the EnOS Management Console and select Data Catalog from the left navigation bar.
- Under the left side of the Data Asset Explorer page, find the Creation Guide, and then click Create FileSet.
- On the Create FileSet page, enter or select the following information:
- ID: enter the FileSet ID, which must be unique in the current OU
- Name: enter the FileSet name
- File Type: select the FileSet file type
- Paradigm: click Add FileSet Paradigm, then enter or select the following information:
- Storage Type: select the FileSet storage type
- Data Source: select the FileSet data source
- Paradigm: enter the FileSet paradigm
- Description: enter a description of the column, no more than 200 characters
- Click OK to create the FileSet.
Creating a DTV Service
Through the Data Catalog, you can create new service instances under DTV (Digital Twin Visualization). DTV discovers OData services through DTV Service asset instances created in the Data Catalog and manages DTV Service data assets.
Log in to the EnOS Management Console and select Data Catalog from the left navigation bar.
Under the left side of the Data Asset Explorer function homepage, find the Creation Guide, and then click Create DTV Service.
On the Create DTV Service page, enter or select the following information:
- ID: enter the DTV Service ID, which must be unique in the current OU
- Name: enter the name of the DTV Service
- Host: enter OData Host
- OData Namespace: enter OData namespace
- Entity Declaration: enter OData metadata parameters (Declare the Entity name so that the entity metadata can be filtered by Entity name.)
- $select Alternative Field: enter the OData $select alternative field (The $select parameter does not support parameters
site.XXX.) - Description: enter a description of the DTV Service
- Other Parameters: Click Add Parameters, then enter or select the following information:
- Name: enter the parameter name
- Tag: enter the input parameter tag
- Parameter Position: select the parameter position
- Parameter Type: select the parameter type
Note
Click Edit
 to edit this parameter.
Click Delete
 to delete this parameter.