Object Type Management
Objects represent specific types of data, specifically the entities that perform related operations in the Data Catalog service. An object represents a collection of data and the related attribute information. The various types of objects make up the core management content of Data Catalog.
The Data Catalog service allows users to create object types and object relationships on their own as a means to build a rational classifications and associations between data.
Creating an Object Type
The Data Catalog service has built-in basic metadata and master data types. In addition, users can create object types by themselves to meet different needs, which allows the organized classification large amounts of data.
For more about the Data Catalog service built-in data types, see Viewing Data Details.
Note
The current version only supports the creation of master data object types.
In the left navigation bar of the Data Catalog, click Object Type.
Click New Object Type> New Master Data Object Type.
On the New Object Type page, enter or select the following information:
Type Identifier: Enter the type identifier of the master data object. The default prefix is
UD_and cannot be changed. It must be unique in the current OUDescription: enter a description of the master data object type, no more than 1000 characters
Attribute Definition:
Attributes Set by Default: Attribute name is
name, type isstring, bothIndexed?andRequiredare set toTrueand cannot be modified. The primary key is ticked by default and the default primary key sequence is1(the primary key settings can be modified or canceled).Click Add Attribute, then add attributes to the master data by entering or selecting the following information:
Name: enter the name of the attribute. Attribute names under the same object type cannot be repeated.
Type: select the type of the attribute value data
Indexable: when
Trueis ticked, the Data Asset Explorer function will support indexing with the attribute information as the key wordIndex Segmentation: when enabled, the Data Asset Explorer function supports word segmentation indexing of attribute values
Note
Indexable is usually ticked as
Truefor commonly searched attributes to improve search accuracy.
Required: when
Trueis ticked, the attribute value is required when performing data sync in the User Synchronization Task function.Primary Key Sequence: the primary key sequence be set only when
Required?is ticked asTrue.- For the primary key sequence, you can select
1,2,3, or nothing (within a type, at least one attribute must be set as the primary key). - The order of the primary keys must be continuous and must start from
1(for example: set the attributes of the primary key sequence as1and2, or respectively set the attributes of the primary key sequence as1,2, and3).
- For the primary key sequence, you can select
Verification Rule:
- Click Add Verification Rules, then add a verification rule for the master data type attribute by entering or selecting the following information:
- Verification Field: select the object attribute that needs to be verified
- Rule Type: select a rule type
- Rule Parameter: enter a parameter (there is no need to input parameter when the rule type is
NOT NULL CHECK)
Note
For more information about verification rules, see Object Type Check Rules.
After the verification rules are configured, the data type attributes will be verified according to the rules during data sync. Verification rules can be started in Creating a User Synchronization Task.
- Click Add Verification Rules, then add a verification rule for the master data type attribute by entering or selecting the following information:
Click OK to submit and create the object type.
After the master data type is created, on the Object Type function homepage, click  View to view the object type’s basic information.
On the right side of the Data Asset Explorer function homepage, you can find Master Data Object Statistics, as well as on the Data Asset Explorer homepage, and will show the newly created master data type and its data object statistics.
You can create this type of sync task in Sync Task. For more information on creating a master data sync task, see Creating a User Synchronization Task.
Creating an Object Relationship
The Data Catalog supports the modeling of relationships between master data.
The object relationship type is a model that defines the relationship between entities. By setting a relationship between two data objects, the user can view the data objects associated with the entity while viewing an object.
Different types of association relationships can be created in the Data Catalog service, including one-to-one, one-to-many, and many-to-one.
OneToOne, for example: the relationship between one single engine and another: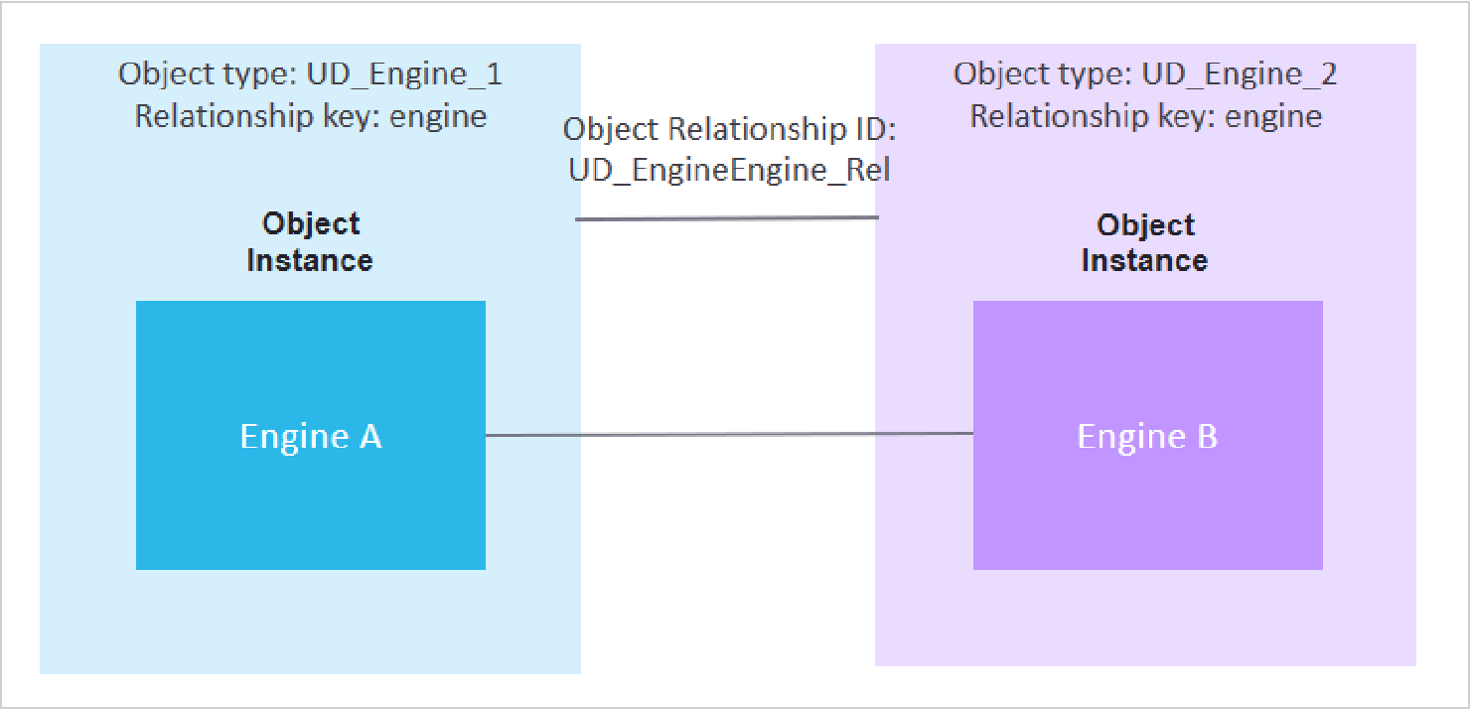
OneToMany, for example: the relationship between a single wind turbine and multiple blades: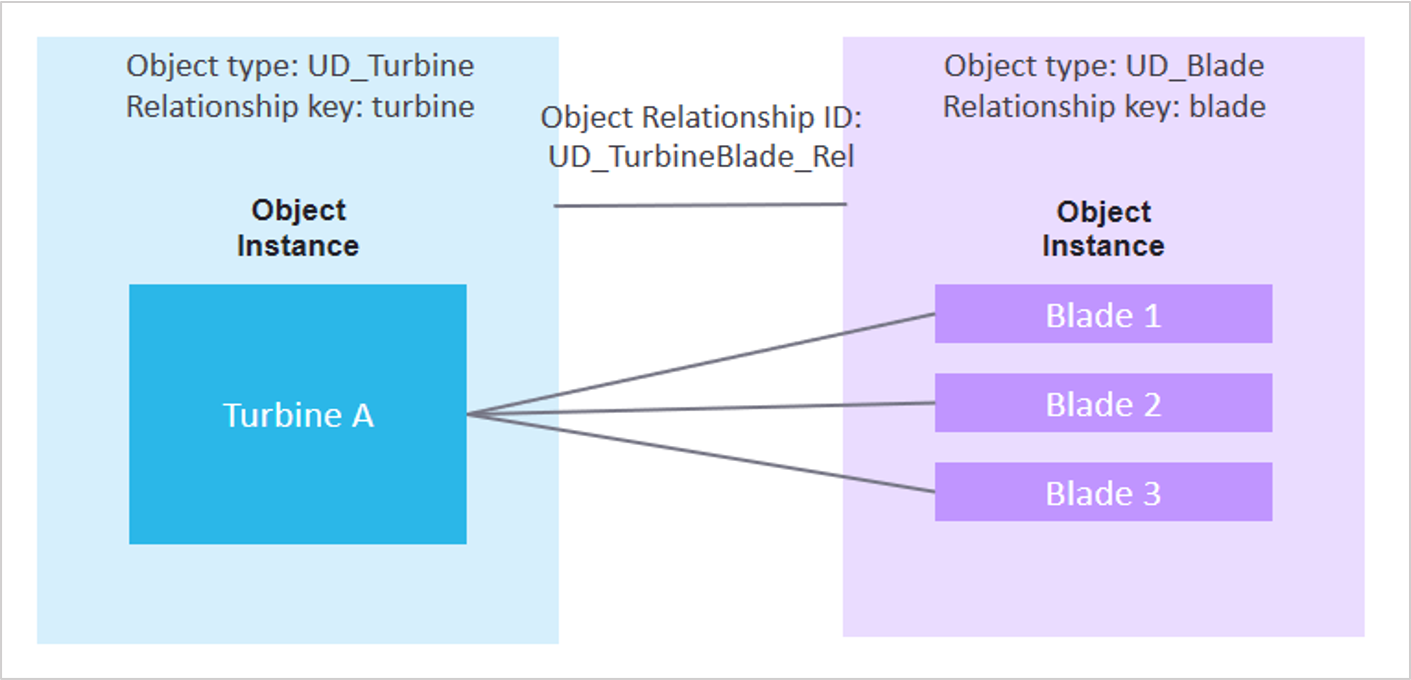
ManyToMany, for example: the relationship between multiple wind turbines and multiple apps: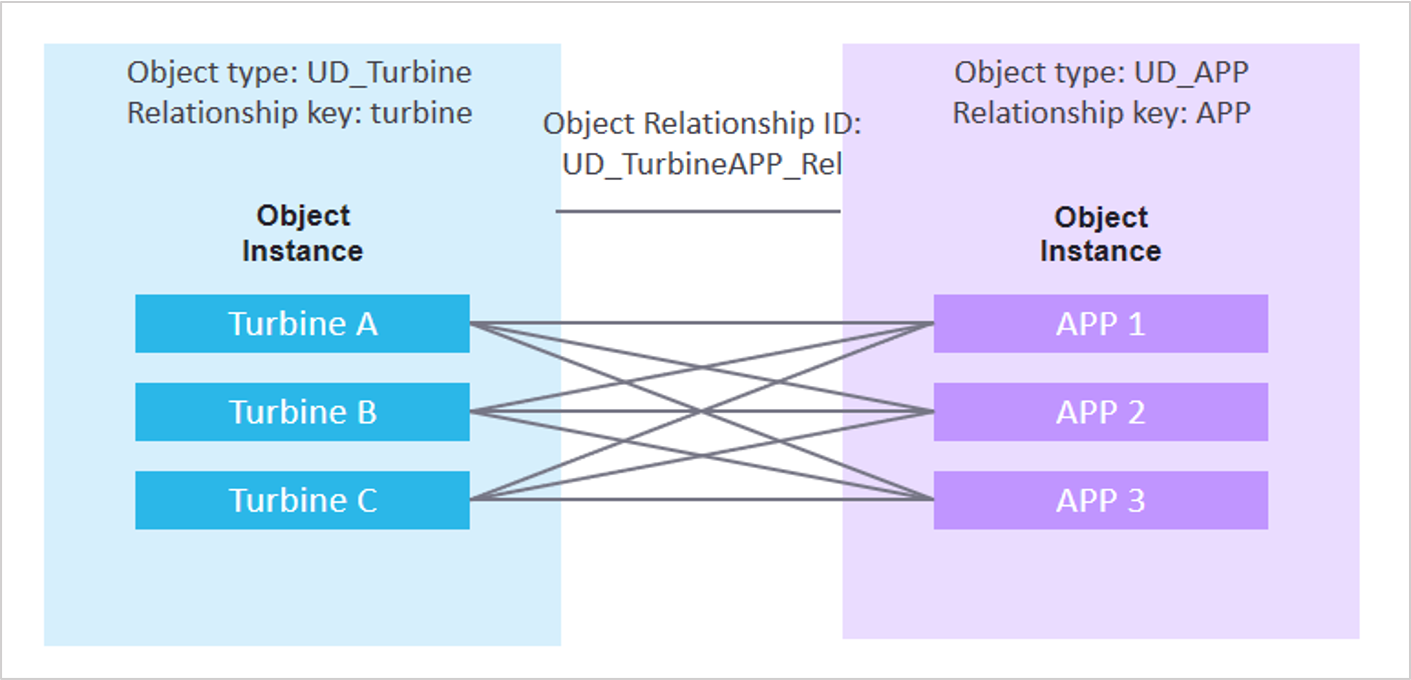
In the left navigation bar of the Data Catalog, click Object Type.
Click the New Object Type> New Object Relationship button.
On the New Object Relationship page, enter or select the following information:
Basic Information:
- Type Identifier: Enter the identifier of the data object relationship. The default prefix is
UD_and cannot be changed. It must be unique in the current OU- Description: enter a description of the object relationship type, no more than 1000 characters
- Correspondence: Select a corresponding relationship (map from left to right,
Type 1is at the left, for example: inOneToManyrelationships,Type 1is the default for “one”, whileType 2is for “many”)
- Type Identifier: Enter the identifier of the data object relationship. The default prefix is
Configuration Relationship:
- Type 1:
- Type Identifier: select a type identifier for a custom object type
- Relationship Identifier: enter the relationship identifier (a key used to find the object relationship), no more than 50 characters
- Type 2:
- Type Identifier: select a type identifier for a custom object type
- Relationship Identifier: enter the relationship identifier (a key used to find the object relationship), no more than 50 characters
Note
The object relationship identifier is used to define the relationship between two types of master data. In the Data Asset Explorer function, you can use Type 1 master data and relationship identifiers to view Type 2 data information. In the same way, you can also use Type 2 master data and relationship identifiers to view Type 1 data information.
- Type 1:
Click OK to create the object relationship.
After the object relationship type is created, on the Object Type homepage, click View to view the object relationship’s basic information and configured relationships
.
In the Data Asset Explorer function, you can view the relationship between different types of objects. For more on viewing relationships between objects, see Viewing Data Details.