Developing General Pipelines
A general stream processing pipeline will consume all the messages in Kafka Internal Topic. Then, the Point Selector operator filters data records that are needed by the pipeline. The stream processing pipeline will consume much more computing resources.
Designing a General Pipeline
Prerequisites
The EnOS Stream Processing Service provides multiple versions of operator libraries. Before designing stream data processing pipelines, you need to install the needed version of operator library. For more information, see Installing an Operator Library or Template.
Take the following steps to develop a general stream processing pipeline.
Log in to the EnOS Management Console, select Stream Processing > Pipeline Designer, and click the + icon above the list of stream processing pipelines.
On the New Pipeline window, select New to create the stream processing pipeline. You can also choose to import a configuration file to create the pipeline quickly.
Enter the name and description of the stream processing pipeline.
From the Template drop-down list, select Origin Pipeline.
From the Operator Version drop-down list, select the installed operator library version.
For Message Channel, select the source of data to be processed:
- If the data is ingested from connected devices, select Real-Time.
- If the data is integrated through the offline message channel, select Offline.
Click OK to create the stream processing pipeline with the basic settings above.

Designing the Stream Processing Pipeline
Follow the steps below to design the stream processing pipeline with stages.
On the pipeline designing canvas, select a stage you want to use (like the Point Selector stage) from the Stage Library in the upper right corner of the page to add it to the canvas.
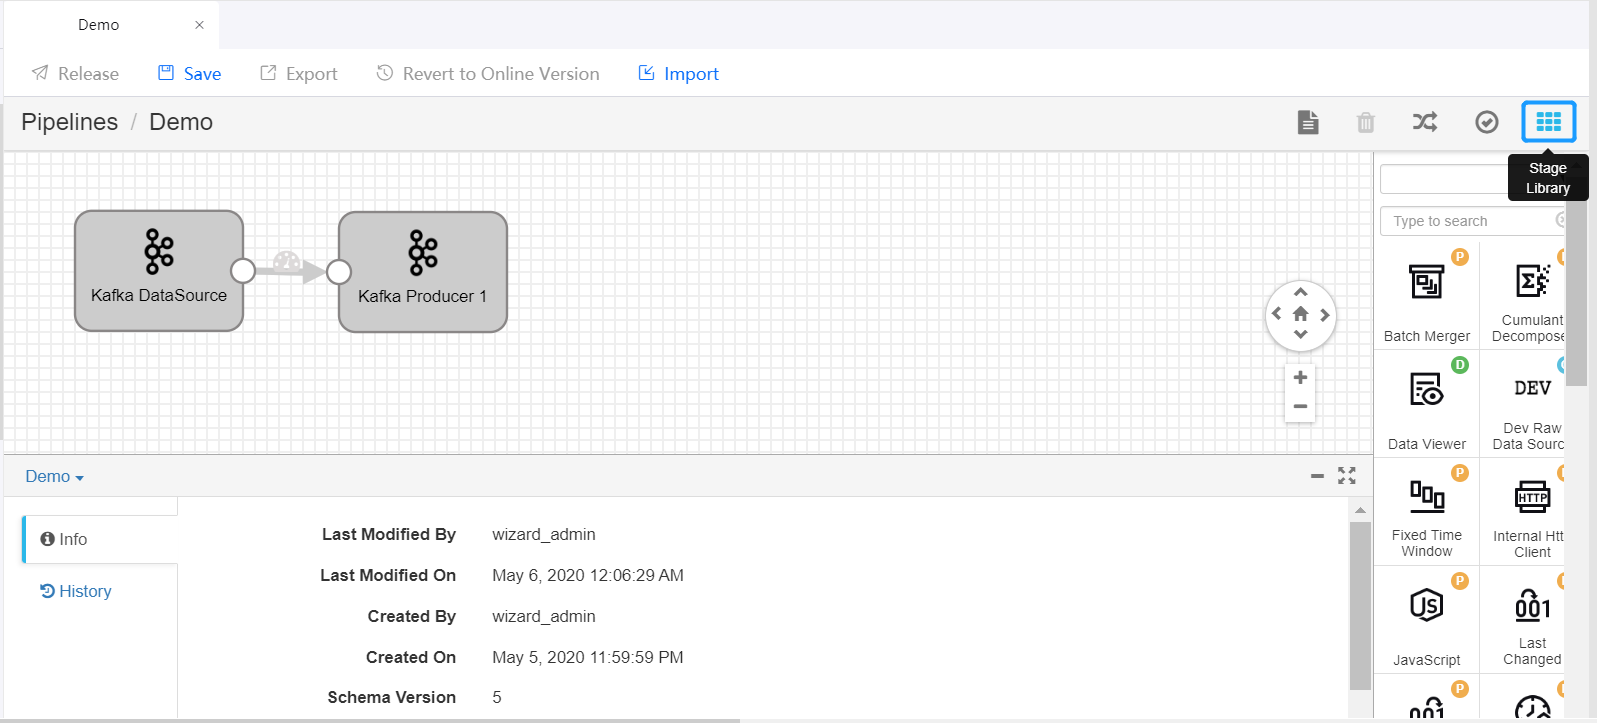
Delete the arrow connecting the Kafka DataSource and Kafka Producer stages and connect the Data Source stage to the new stage by clicking the output point of the Data Source stage and dragging it to the input point of the new stage. Do the same to connect the new stage to the Producer stage to complete adding the new stage to the pipeline. Click on the new stage and complete the parameter configuration.
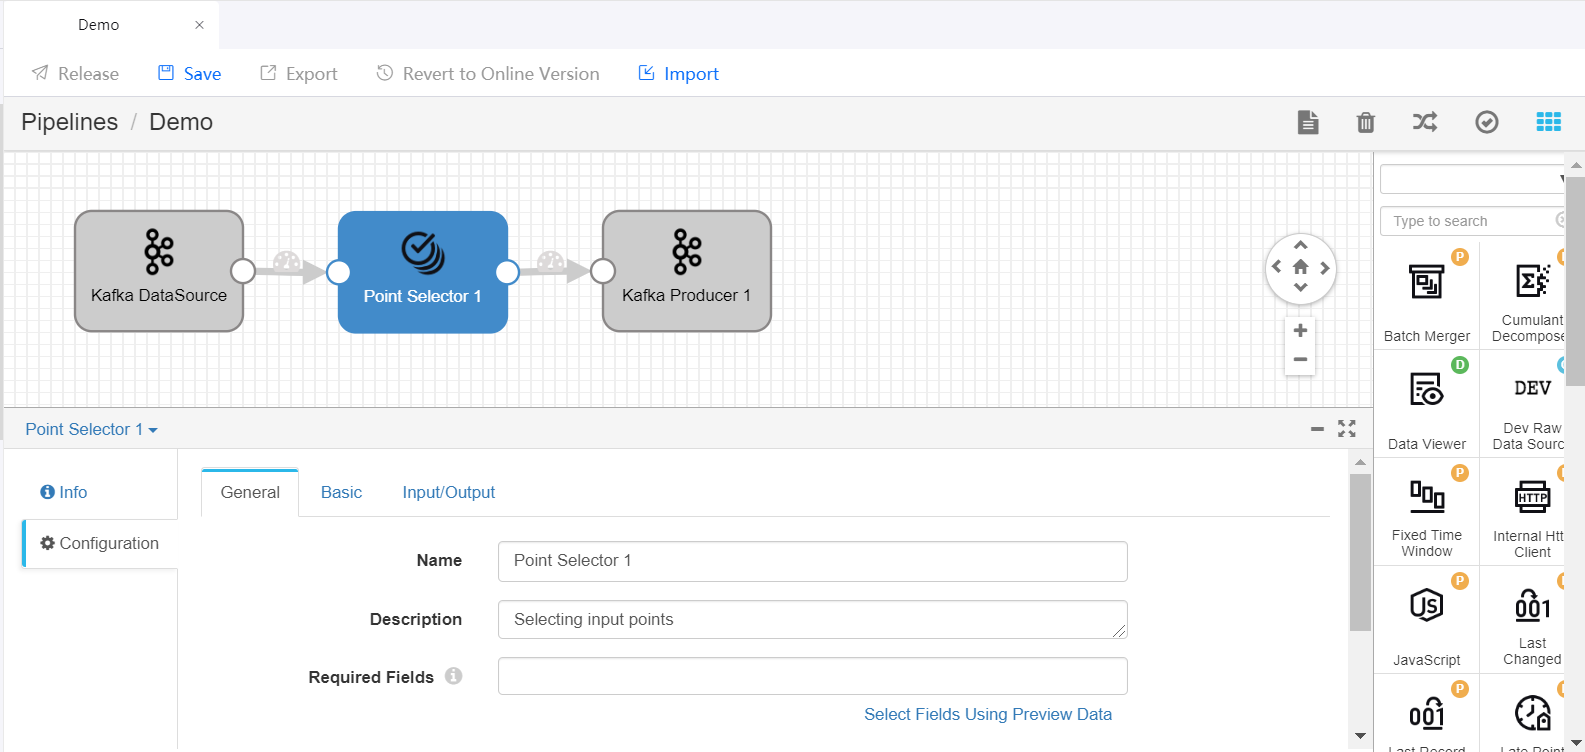
Repeat steps 1 and 2 to add more stages to the pipeline and complete the parameter configuration of the added stages.
Click Save in the tool bar to save the configuration of the pipeline.
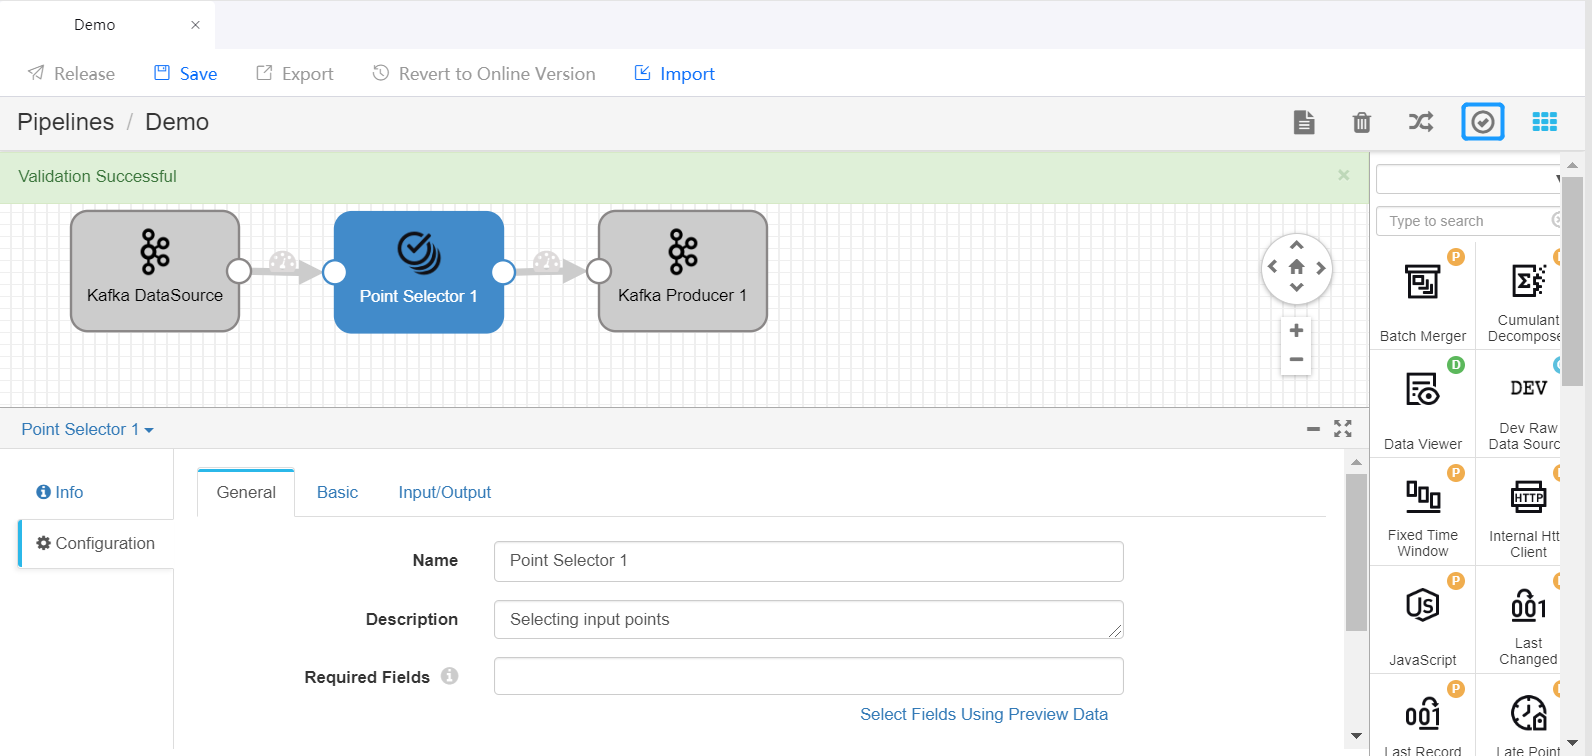
Click the Validate icon |icon_validate| in the tool bar to check the parameter configuration of the stages. If the validation fails, update the configuration accordingly.
For more information about designing stream processing pipelines, see StreamSets User Guide.
Publishing and Running the Pipeline
If the validation is successful, you can publish the pipelien online and start it.
- Click Release in the tool bar to publish the pipeline.
- Open the Stream Processing > Pipeline Operation page, view the published pipeline, whose status is PUBLISHED by default.
- Complete the running resource configuration and alarm settings for the pipeline, ensure that the required system pipelines are running, and click the Start icon |icon_start| to start running the pipeline.
For more information about pipeline operations, see Maintaining Stream Processing Pipelines.
Operator Documentation
For detailed information about the function, parameter configuration, and output of the available operators, see the Operator Documentation.