Managing Applications
This section shows how the project owner can create an application and manage the application members and other basic information.
Creating an Application
Log in to the EnOS Management Console and select Enterprise Container Platform in the left navigation menu.
Select your organization from the Organization menu.
Select the created project from the Project menu.
Select Application from the left navigation, click New Application, and select the type of the application to create from the list. Different application types have different configuration steps. This section will use the Normal application as an example.

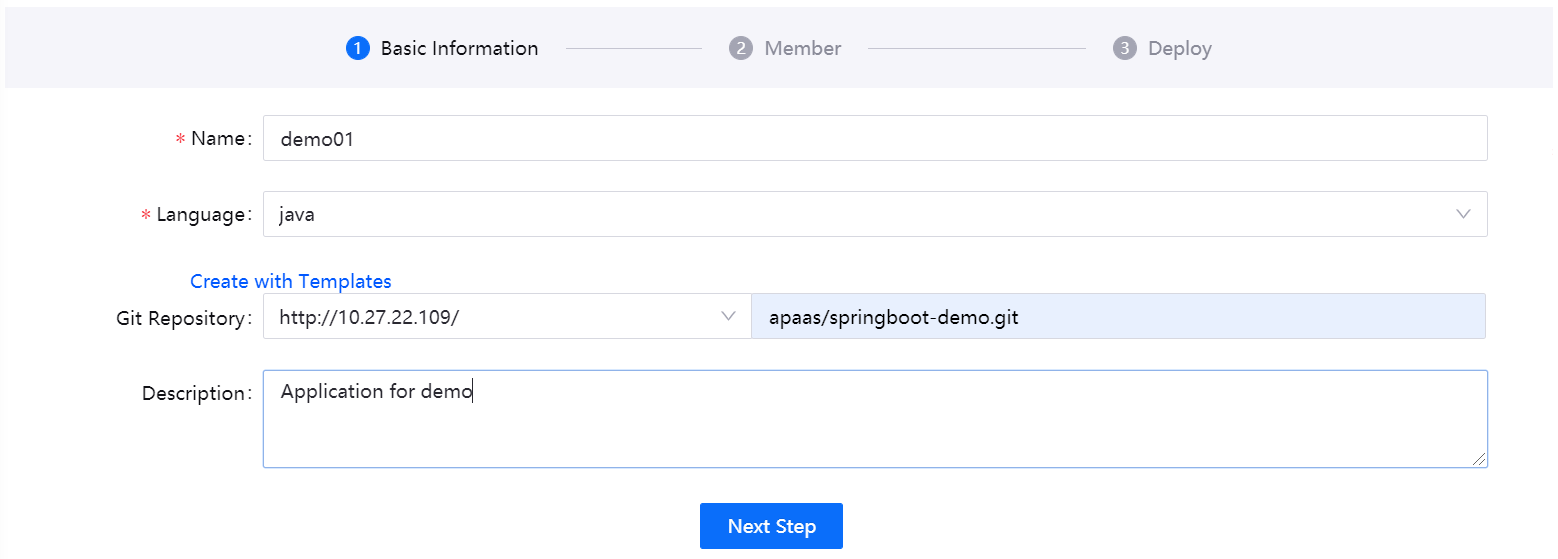
Enter the application name and select the application development language.
Enter or select the application GitLab repository, and enter the path of the Git project. The repository can be left blank here, and be edited in application Basic Information after it is created.
Enter description for the application and click Next Step.
Select one or more application members and the member role, click Add Member, and click Next Step.

Configure the detailed container deployment information for the application. Click Skip to skip the configuration if you want to configure the container information after the application is created. For details, see Managing Container Configuration.
Once the application is created, you can view its basic information by clicking on the application name in the application list.
Editing Application Information
The project administrator or application owner can edit the basic information of any created applications.
In the left navigation bar, select Application. In the application list, click the application name to open the application details page.
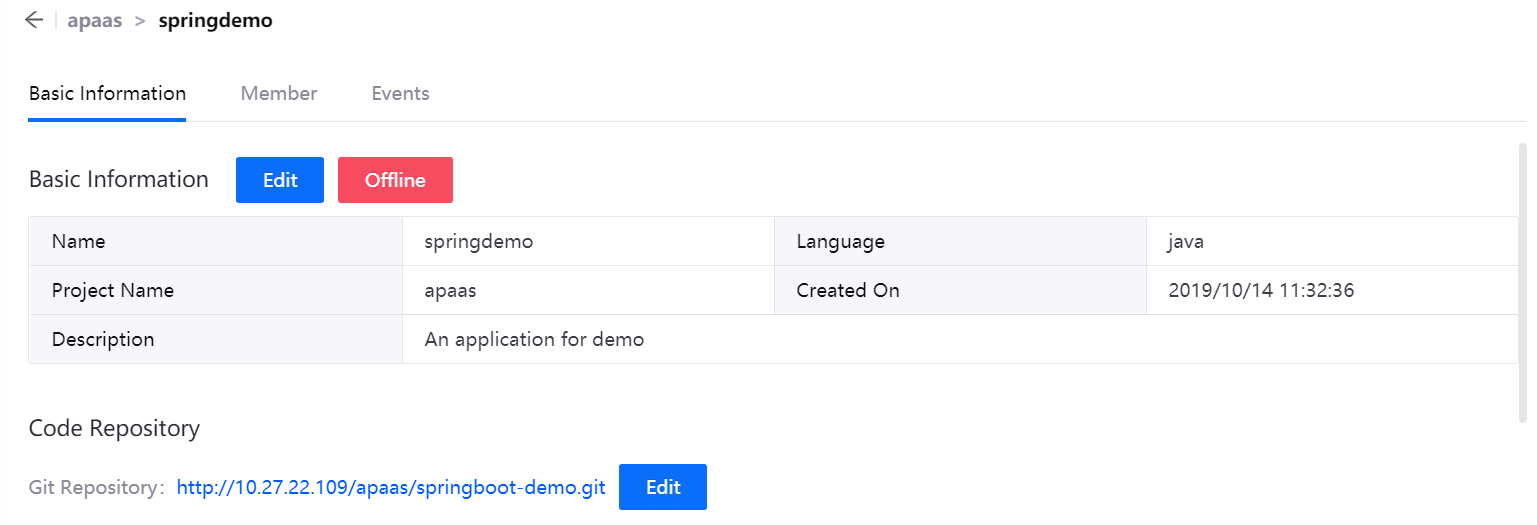
In the Basic Information section, click Edit to update the development language and description of the application. Click Offline and then confirm making the application offline. Note that once the application is offline, you cannot create another application with same name.
For Code Repository, click Edit to update the application’s code repository.
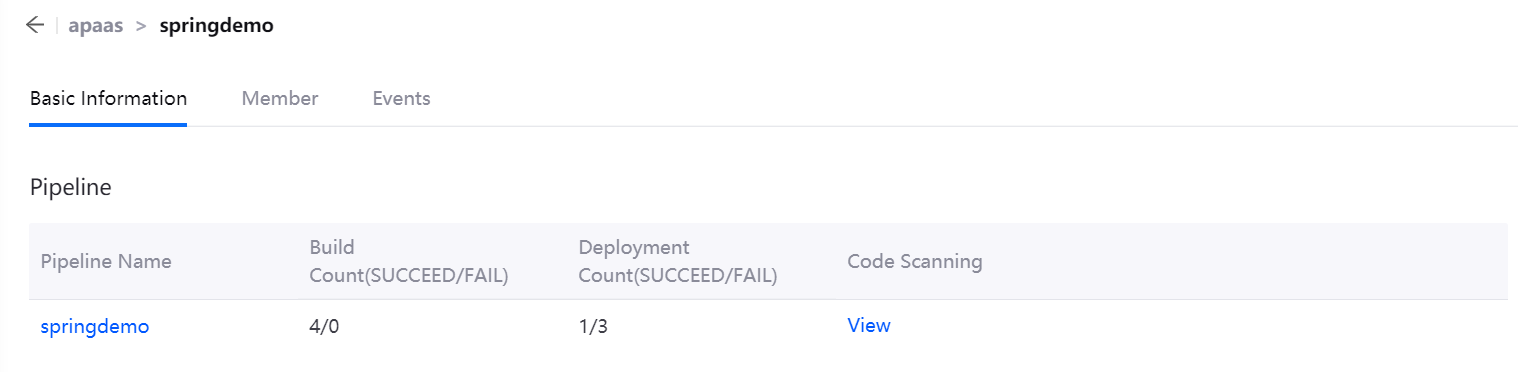
In the Pipeline section, you can view the running history of the application, including the pipeline name, the number of successful and failed jobs, and more.
In the Container Resources section, you can view the container resources of the application in each environment and cluster, or edit the container configuration.

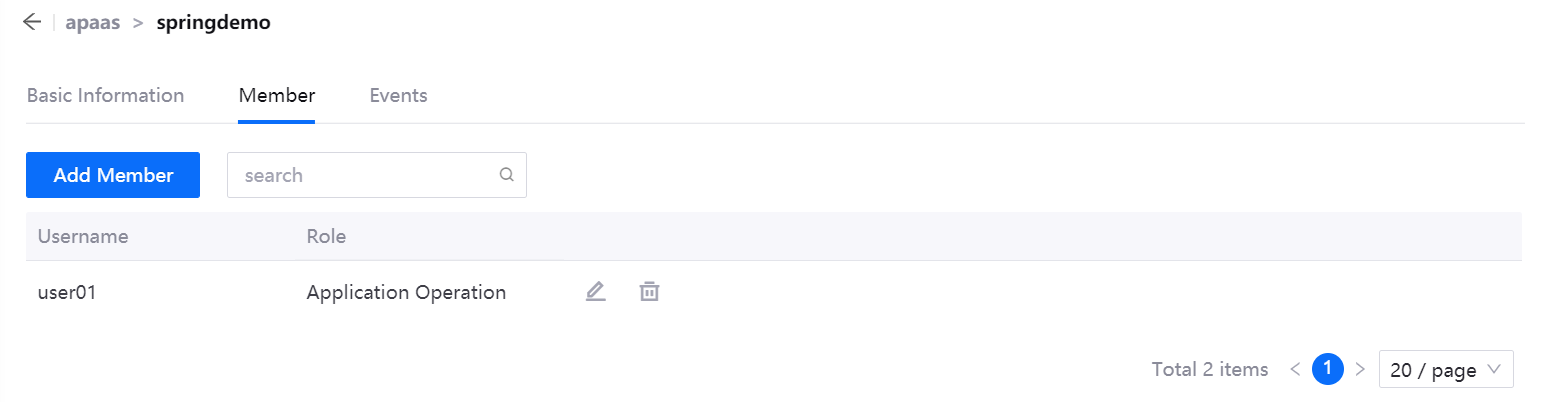
Under the Member tab, you can add application members, search for members, update the roles of existing members, or remove members.
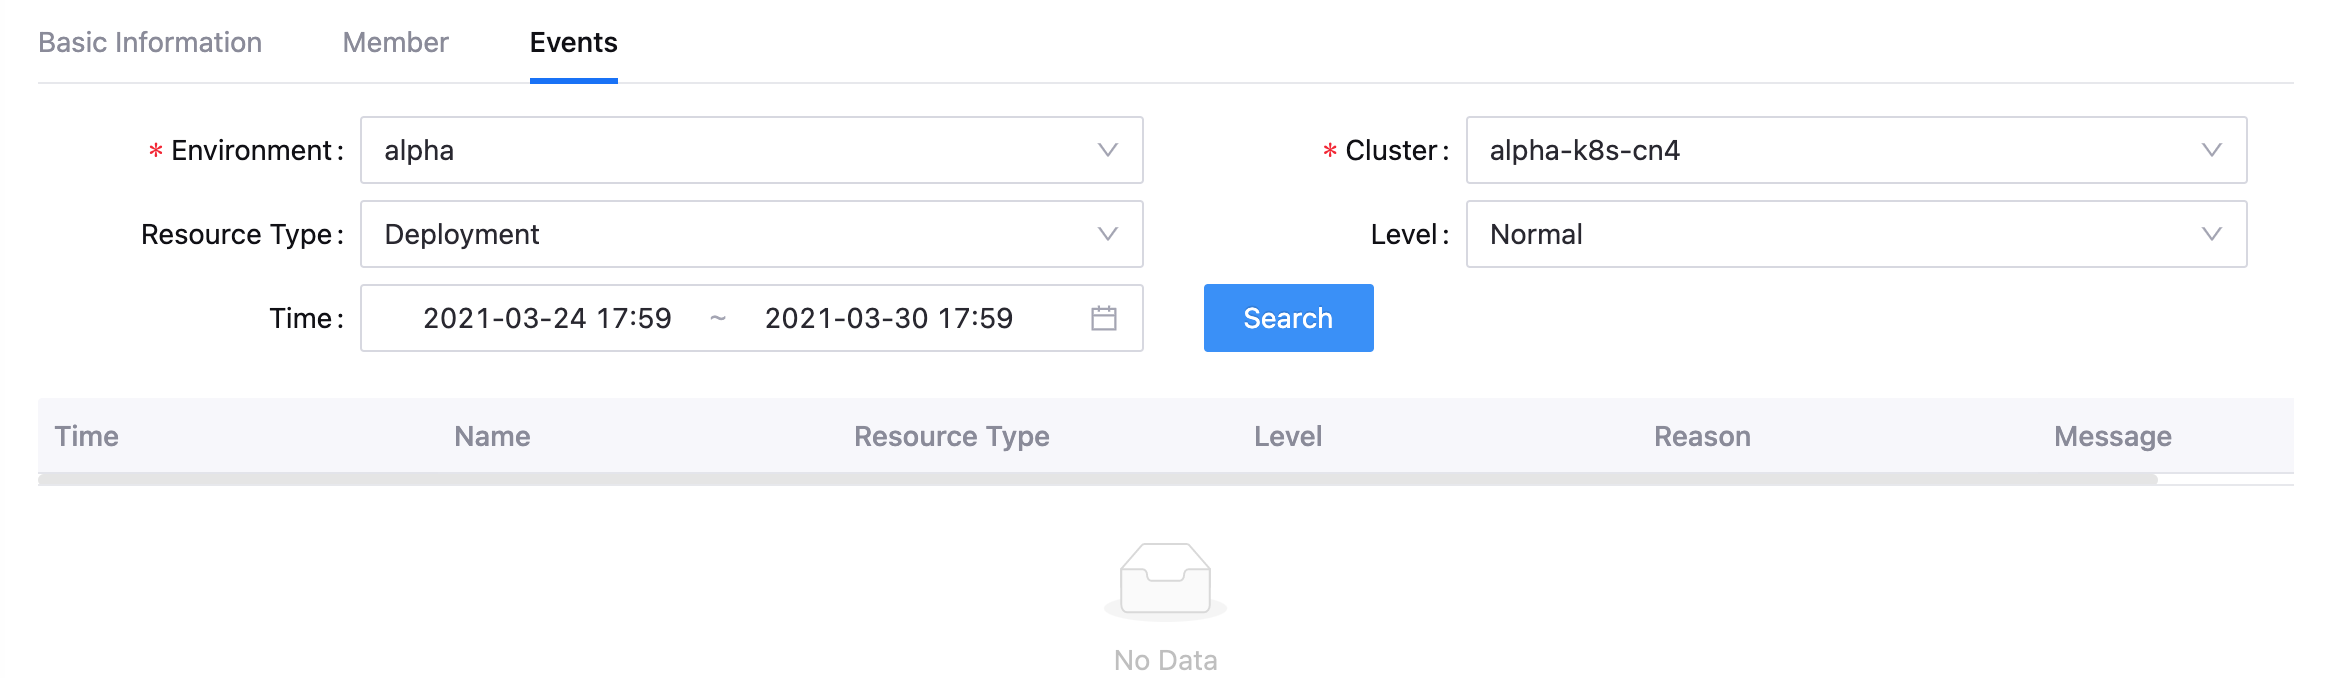
Under the Events tab, you can search the event information of the application in specified environment, cluster, and time range (in the past 7 days).