Configuring Data Archiving Jobs
EnOS Data Archiving Service supports archiving and storing data from the real-time message channel, data from the offline message channels, real-time alert records, and data stored in TSDB. It provides flexible storage configurations to reduce your data storage costs.
Prerequisites
- Authorization to access the Data Archiving module
- Your OU has requested for the data archiving resource
Creating a Data Archiving Job
For archiving and storing data, you need to create data archiving jobs for asset models.
Log in the EnOS Management Console, and select Data Archiving under the Common Resource section.
If your OU has not requested data archiving resource, go to EnOS Management Console > Resource Management > Common Service.
Click New Job, select the source of data to be archived:
- Real-Time Message Channel: Archiving real-time data ingested from devices or generated by stream data processing jobs (data archiving job type is Real-Time).
- Offline Message Channel: Archiving offline data integrated from the offline message channel (data archiving job type is Real-Time).
- Real-Time Alert Record: Archiving real-time asset alert records (data archiving job type is Real-Time).
- TSDB: Archiving history data stored in the time series database (data archiving job type is Offline).
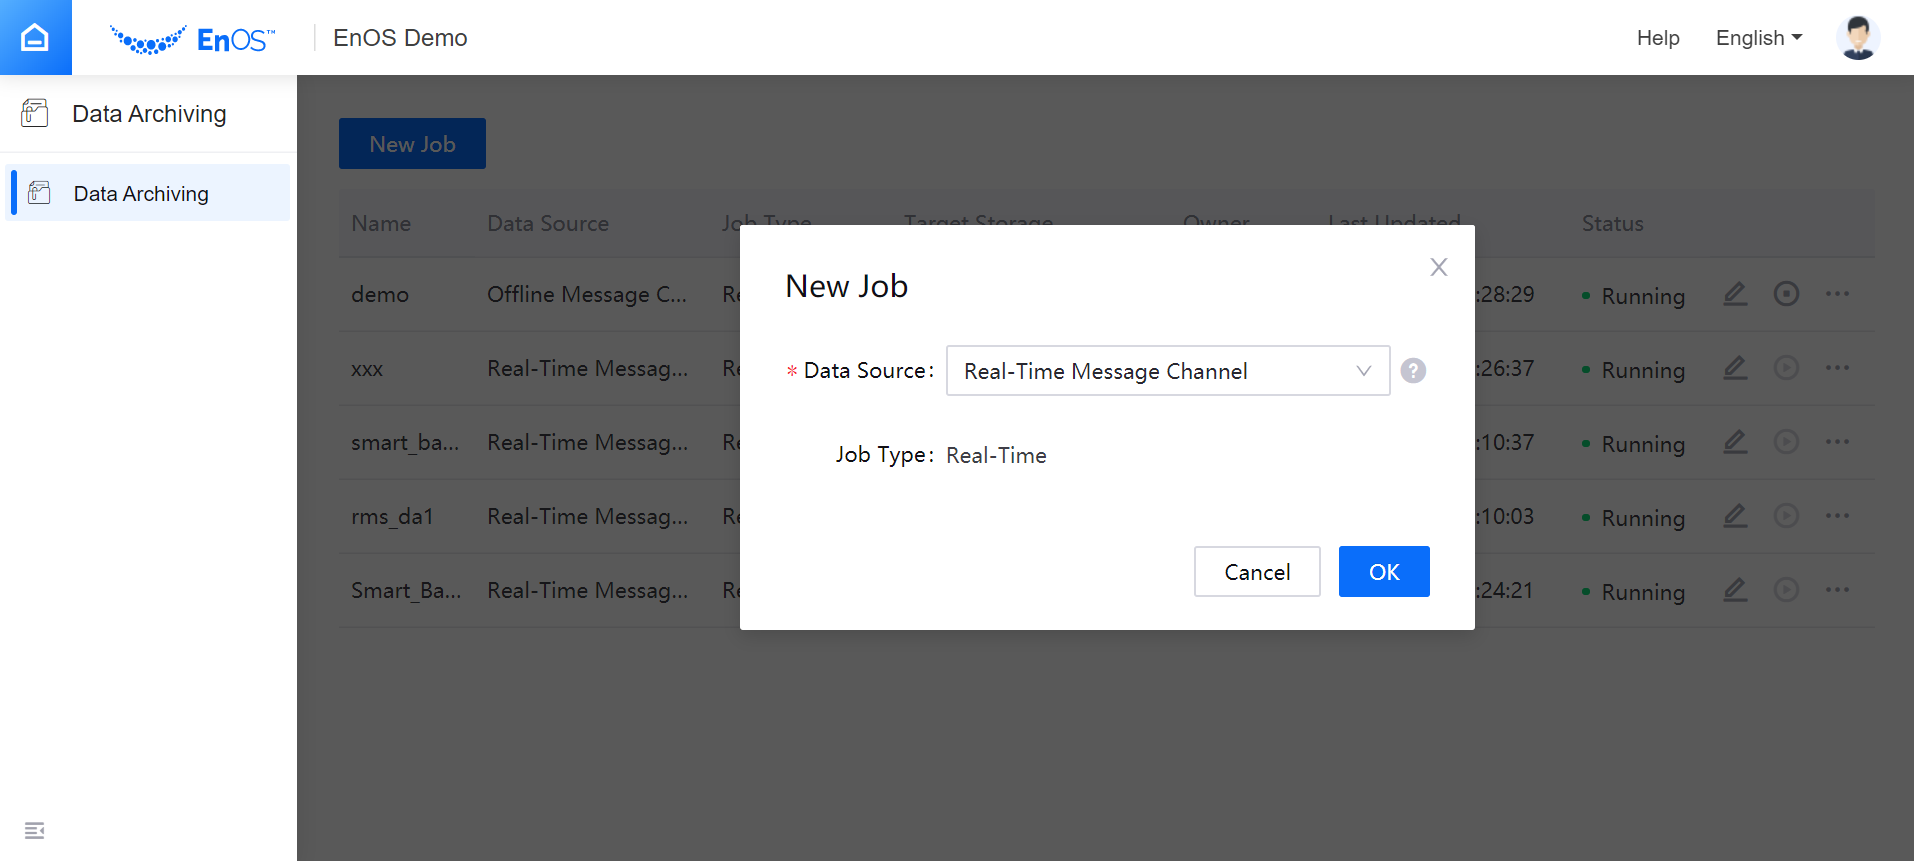
Click OK to complete the basic setting and open the detailed configuration page of the data archiving job.
Note
At most 10 data archiving jobs can be created for an organization.
Basic Information
Provide the basic information of the data archiving job.
- Name: Name of the data archiving job, where Chinese characters, upper cases and lower cases, numbers, underline are supported, with a length limit of 50 characters.
- Description: Description of the data archiving jobs, with a length limit of 100 characters.
Storage Configuration
Complete the data storage configuration, including configuring the storage resource, setting properties of the archived file, etc.
Select Resource Type and specify the target storage system (BLOB or HDFS) for synchronizing the archived files.
From the Storage Resource drop-down list, select the BLOB data source that has been registered through Data Source Registration or the HDFS storage that has been requested through Resource Management on EnOS.
Input the Storage Path where the archive files are located in the storage system and select the time partition format for the storage path root directory. The path must start and end with “/”. For detailed information about time partition format, see Storage Path Partition Parameters.
Select whether to generate path by event time or by system time. For detailed description about how to generate directory by different time, see Data Archiving Logic.
Note
For archiving data from offline message channel and real-time alert records, it is supported to generate path by event time only.
Input the File Name of the archived file, where upper cases, lower cases, numbers, and hyphens are supported, with a length limit of 50 characters. Once a file is generated, the system will append a time stamp suffix “_UTC” after the file name. When “Generate path by event time” is selected, the time stamp suffix is UTC+0 corresponding to the data event time; when “Generate path by system time” is selected, the time stamp suffix is UTC+0 corresponding to the system time.
Select File Type, where only TEXTFILE format (.csv) is supported currently.
Select the Encoding for archived file, where the default format is UTF-8.
Select Column Delimiter, where the default delimiter is comma.
Select the Compression format for the archived file, where the default setting is Not compressed. You can choose the compress the archived file as GZIP format.
Note
When the target storage system is BLOB, the content type of the archived file is as follows:
- When you choose to compress the archived file (.gzip), the content type of the archived file is application/octet-stream.
- When you choose not to compress the archived file (.csv), the content type of the archived file is application/csv.
Select the File Size for the archived file, that is, the file size limit before compression. If the size of a file exceeds the upper limit, the system will slice it for storage. The sliced files will be named in the form of
filename_UTC_n, wherenis a 6-digit random string.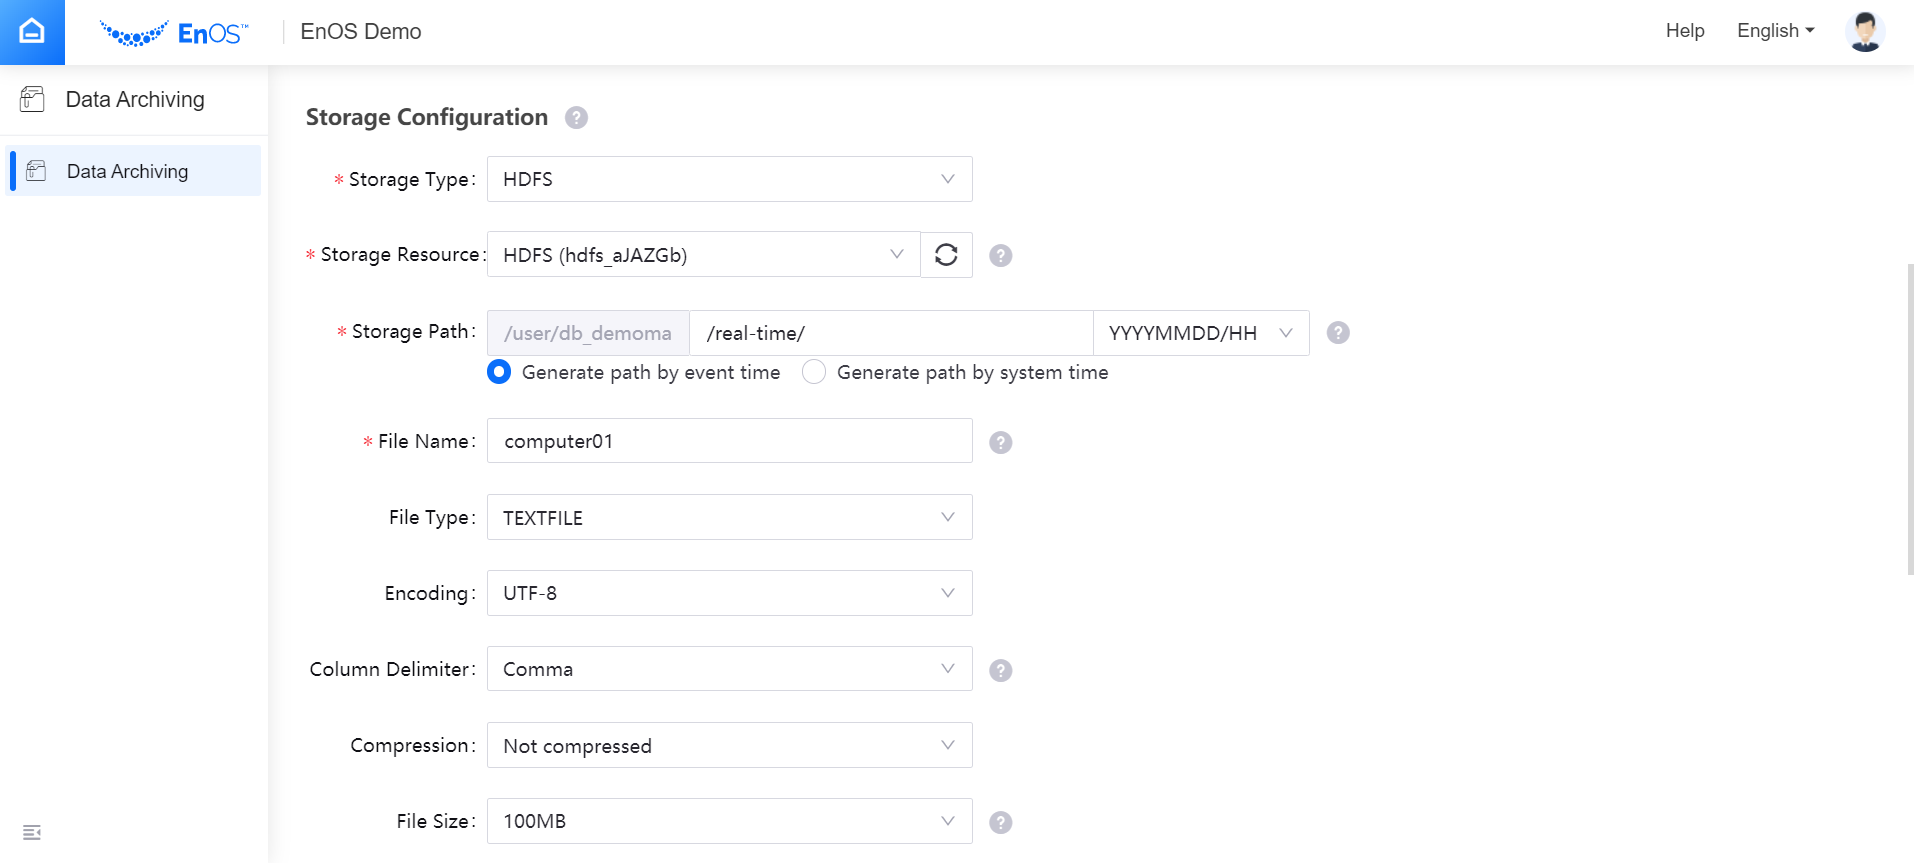
Note
Once the data archiving job is submitted, the file type, encoding format, column delimiter, and compression format cannot be modified.
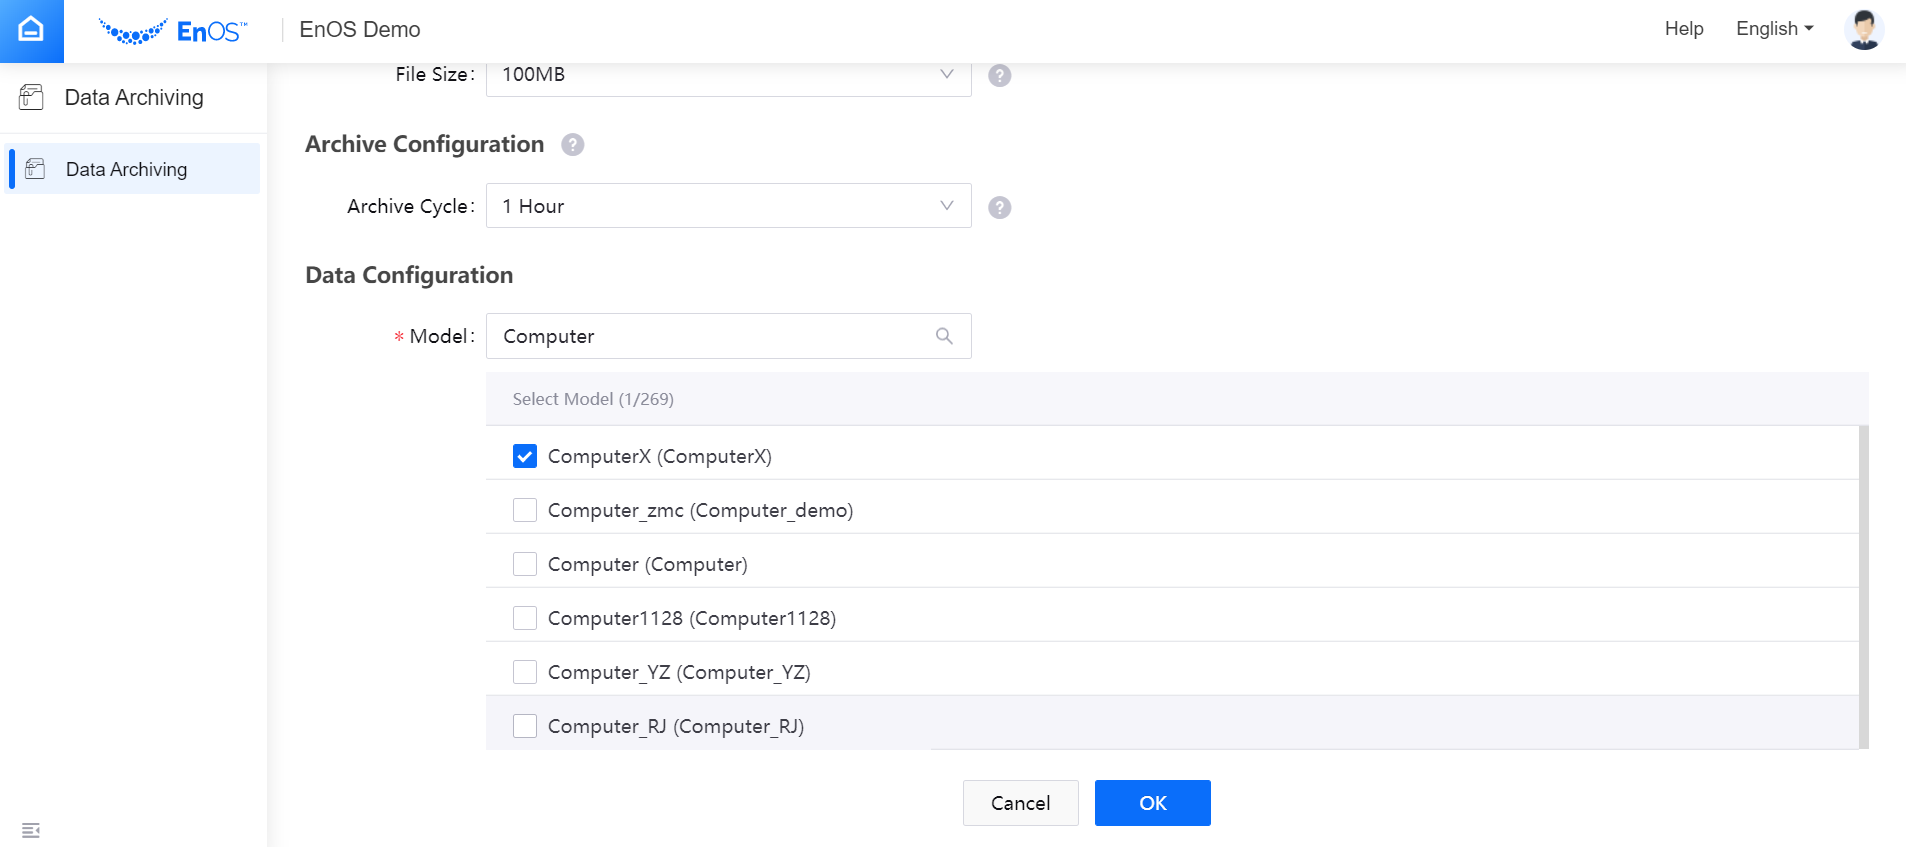
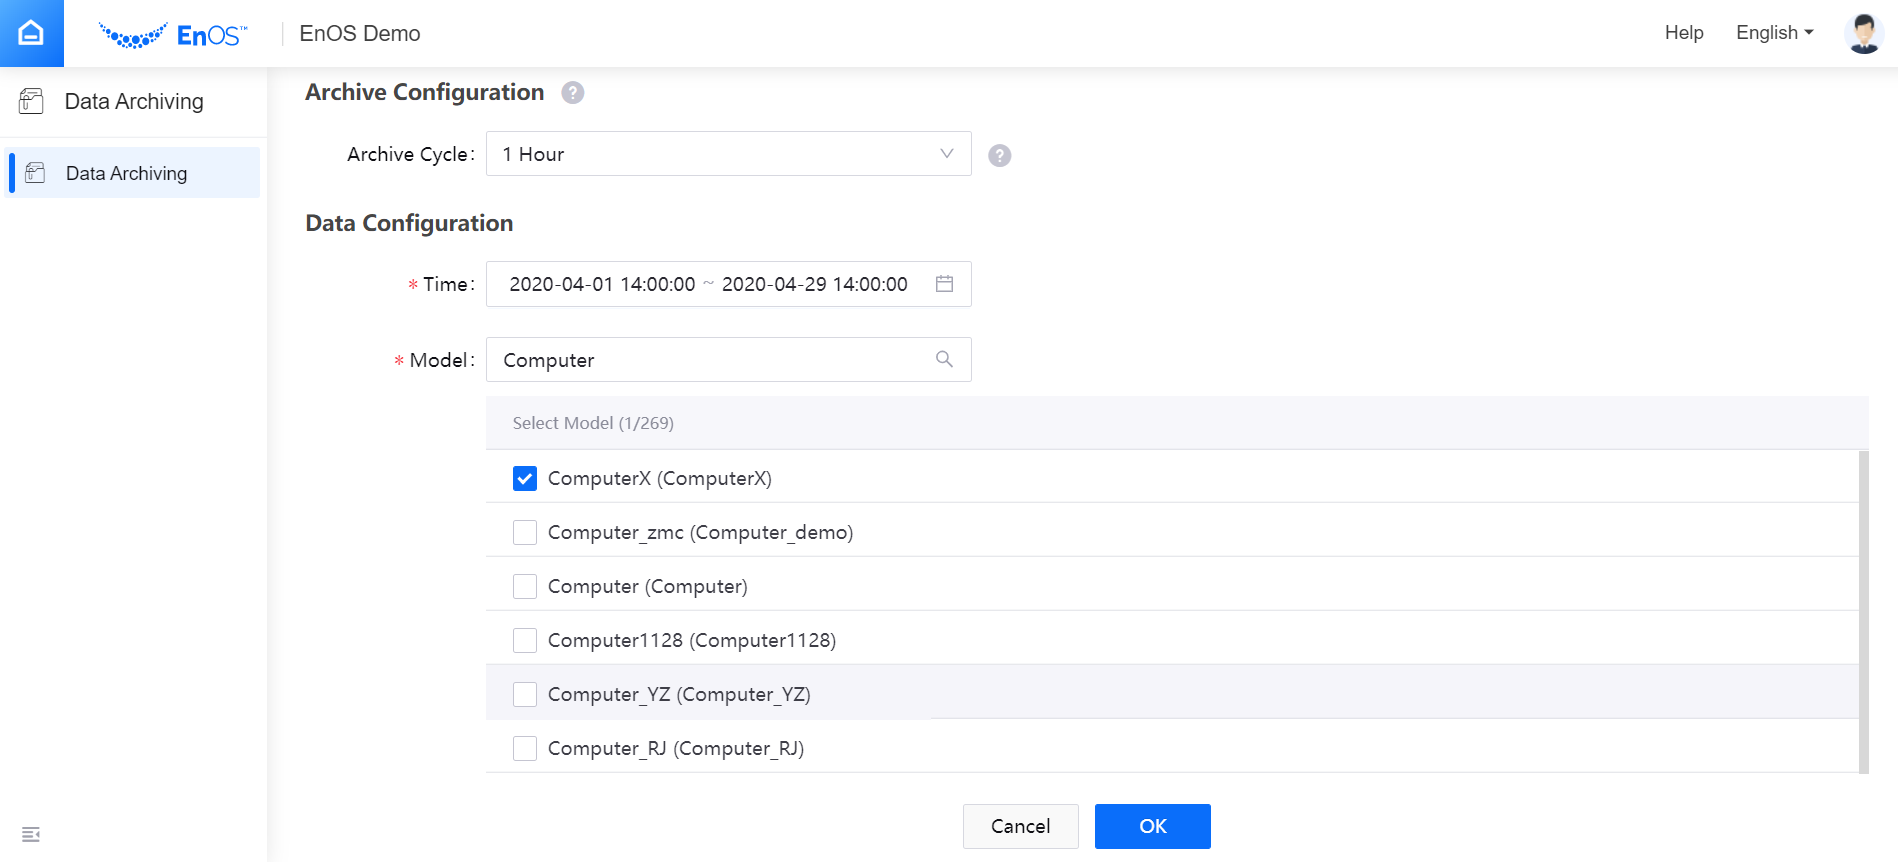
Archive Configuration
Select the Archive Cycle for the data archiving job. Currently, data archiving by every 1 hour, 12 hours, or 24 hours is supported. If the archived data falls in the same archiving cycle, the data will be saved in 1 file and sliced by the specified file size.
It is suggested to select a longer archiving cycle, which is helpful to reduce the number of small files due to data latency. Different archiving cycles mean different scheduled starting time of the data archiving job as well as different data processing time range. The archived data range for each archiving cycle refers to the data generated between “the scheduled starting time for the previous archiving cycle” to “the scheduled starting time for the current archiving cycle”. The archiving cycle cannot be modified once the data archiving policy is submitted.
For the scheduled starting time and archived data time range for each archiving cycle, see Archiving Cycle Configuration.
Data Configuration
Real-Time Message Channel and Offline Message Channel
Select the Model to which the data to be archived belongs.
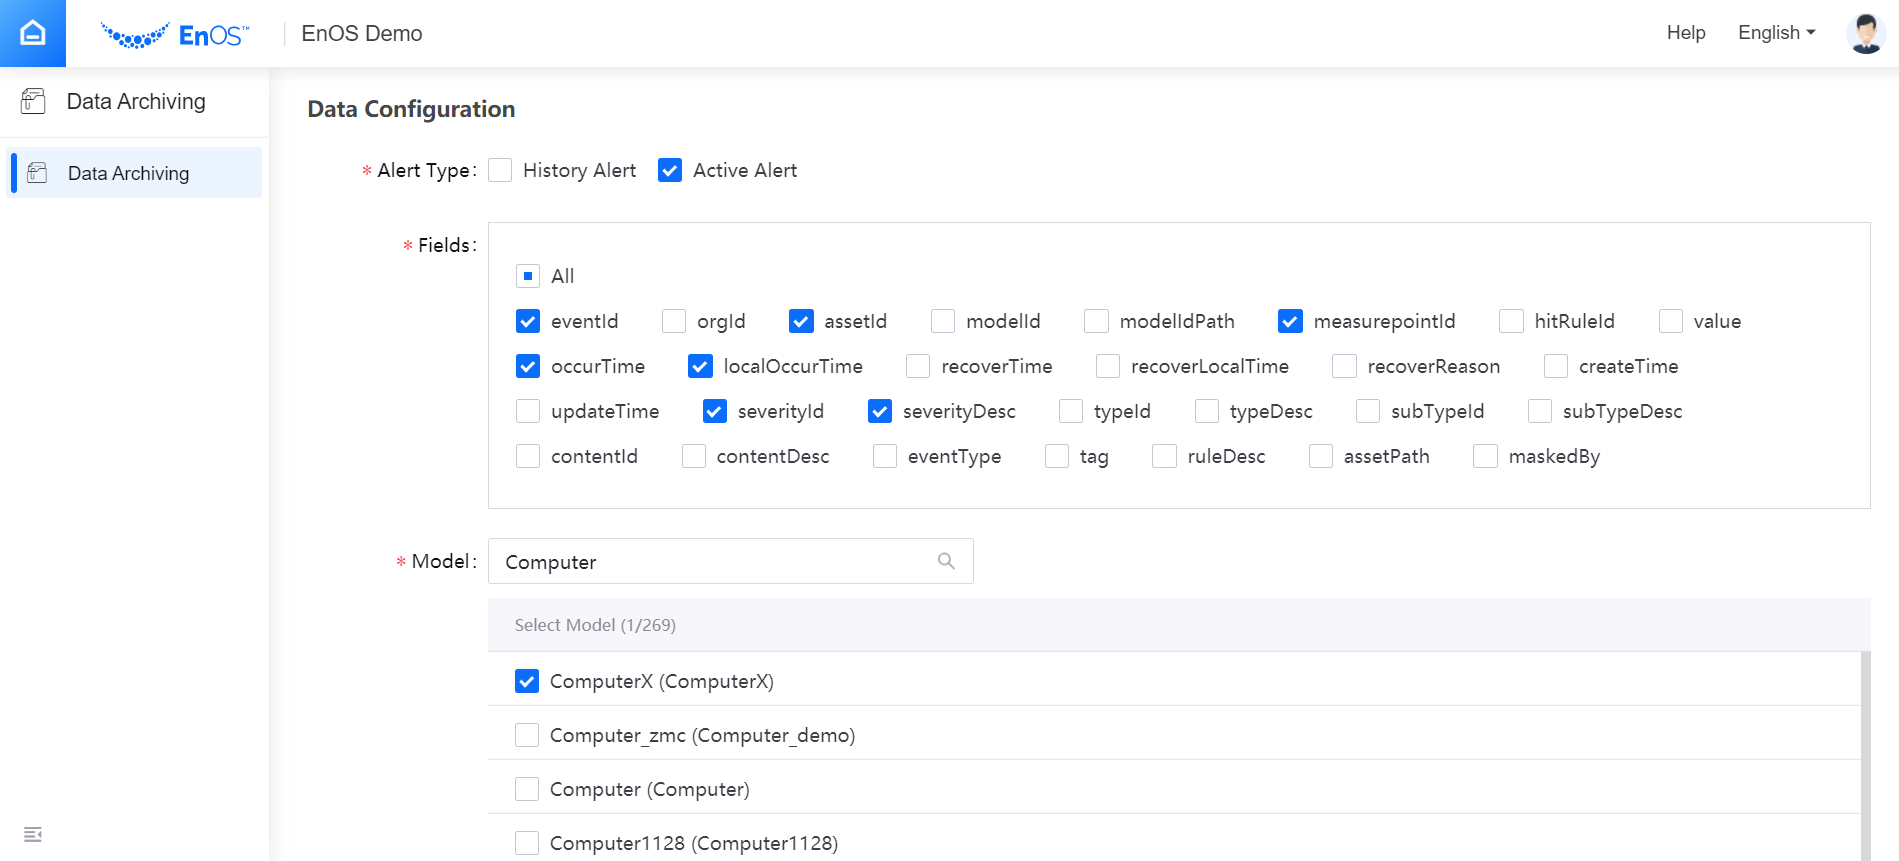
Real-Time Alert Record
Select the type of alert records to be archived, history alerts or active alerts. History alerts are recovered alert records, and active alerts are records not recovered yet.
Select the fields of alert records to be archived.
Select the Model to which the alert data to be archived belongs.
TSDB
Select the time range for query data stored in TSDB (by device local time). The longest time range for an archiving job is 30 days or 1 natural month.
Select the Model to which the data to be archived belongs.
Submitting the Archiving Job
After completing the above configuration, click OK to submit the data archiving job. The job configuration will take effect immediately once it is submitted.
- When the data archiving job is submitted, the system starts reading data from the specified message channel.
- If the current data archiving job is not completed in the current archiving cycle, it will restart immediately per the newly-submitted configuration. Archived files will not be impacted. Data of the added models will also be archived immediately when the arching job is submitted.
- For more information about how archived files are generated, see Generation of Archived Files.