Registering and Managing Applications
EnOS™ provides developers with the ability to create applications, delete applications, purchase applications, and manage the organization’s application users, where menu and permission management are mainly for application portal developers.
Registering an Application
When calling EnOS REST APIs for application development, a service account (SA) issued by EnOS is required as parameters. The SA consists of the accessKey and secretKey, which are generated by registering an application on EnOS through the following steps.
Navigate to the Application Registration page of the EnOS Management Console via the navigation menu on the left and click Create App.
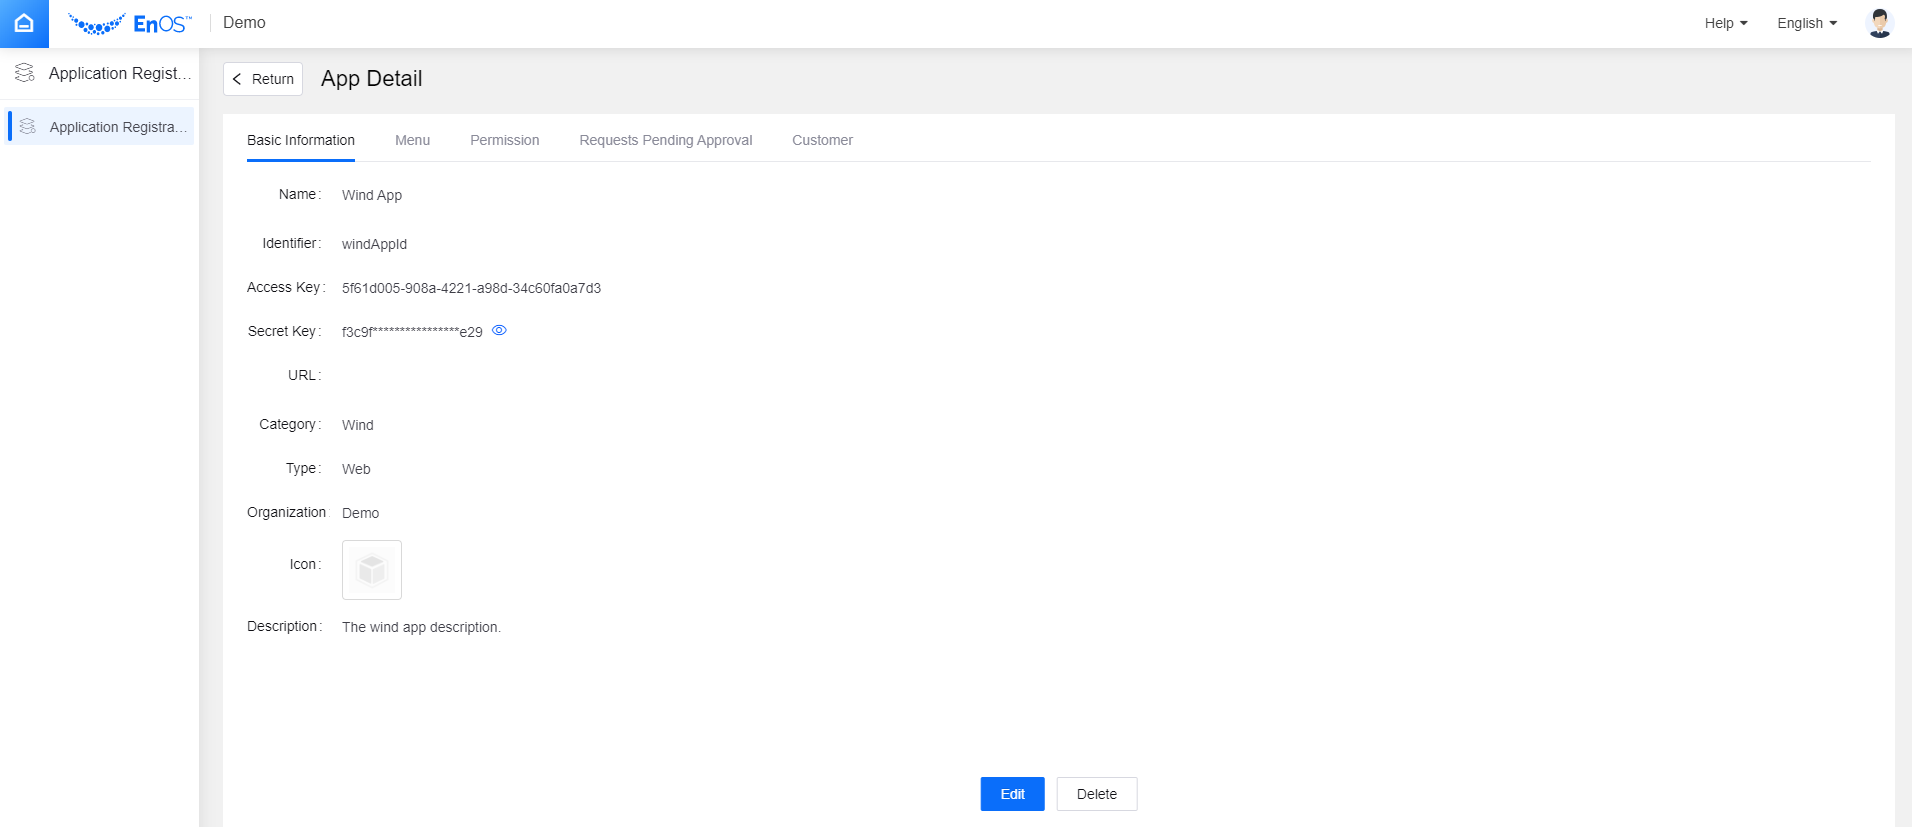
Fill in the application information.
Field Description Name The name of application, limited to 100 characters. Internationalization of the name is optional. If not given, the text entered in this field would be used. Identifier The ID for this application. URL The URL of the application, limited to 2000 characters. Category The industry or business that the application will be used for. Type The application type, whether it is used for Web or mobile. Icon The icon for the application. The icon has to be either jpg or png, 200x200 pixels, with a maximum size of 50KB. Description The description of the application, limited to 1000 characters for both English and Chinese text. Internationalization of the description is optional. If not given, the text entered in this field would be used. Click Confirm to finish.
After the application is created, it will be listed under the Apps of This OU tab. Click the application name to view its detailed information (such as the accessKey and secretKey).
Managing the Application Menu
One application can have more than one functional menu, and the user who bought the application may not buy all of the menus. The application manager can manage all the application menus, create new menus, and specify the available menus for different organizations and users. EnOS currently supports the setting up of up to 2 levels of menus for an application.
Creating a Menu
Menu configuration is a prerequisite for authorizing users to use specific menus. Follow the steps below to set the configuration.
Select Application Registration, and click the application to view the details.
Select the Menu tab, and click Create Menu. Fill in the information in the pop-up window.
Field Description Name The name of the menu, limited to 40 characters. Internationalization of the name is optional. If not given, the text entered in this field would be used. Identifier The menu ID. This field supports letters, numbers, underscore (_) and period (.), and needs to be within 4 to 30 characters. Level Select which level to put the menu: first level or second level. Parent If Level 2 is selected for Level, choose a parent menu for it. Sorting ID Determines the order of the current menu at its level. Beginning with 1, the menu with a smaller sort ID will rank higher in the order. URL The URL address of the menu, with a limit of 2,000 characters. Description The menu description, limited to 500 characters. Internationalization is optional. If not given, the text entered in this field would be used. Click Confirm to finish.
After the menus are created, they can be viewed and edited under the Menu tab.

Batch Authorizing the Application Menu
Under the Menu tab, click the Authorize icon  of the menu to view all the users who have bought the application. Click the checkbox beside the users’ names and click the “OK” button to give them the menu authorization.

Managing Permissions
Permission refers to an independent permission resource in an application. For example, there are three remote functions in an application menu: remote start, remote stop, and remote reset. Among the users who can access this application, only a few users have the permission to use those functions.
Creating Access
Click Permission > Create Access Point in the App Detail page, and fill in the information in the pop-up window.
| Field | Description |
|---|---|
| Name | The name of the menu, limited to 40 characters. Internationalization of the name is optional. If not given, the text entered in this field would be used. |
| Identifier | The access point ID. This field supports letters, numbers, underscore (_) and period (.), and needs to be within 4 to 30 characters. |
| Description | The menu description, limited to 500 characters. Internationalization is optional. If not given, the text entered in this field would be used. |
After the access points are created, they can be viewed and edited under the Permission tab.

Batch Authorizing the Application Access
An application can have multiple access permissions, though the user who bought the application may not own all the access permissions. The access permissions for different organizations and users can be specified by the application manager.
Under the Permission tab, click the Authorize icon of the access point to view all the users who have bought the application. Click the checkbox beside the users’ names and click the “OK” button to give them the access point authorization.
Managing Application Users
When clients or other developers send requests to purchase your application through EnOS, you will need to process the requests and manage the resource authorization in the App Detail page.
Click the Requests Pending Approval tab to view the pending client requests.
Approve or reject the purchase requests by clicking the icon
 .
.
All approved requests are listed under the Customer tab in the App Detail page, where the application developer can view and modify the menu and permission authorization.
Purchasing an Application
Application developers can sell or purchase applications through EnOS. This facilitates application sharing and reduces the repetitive developing of similar applications.
If you want to purchase an application that is developed on EnOS, go to Application Registration in the EnOS Management Console, click the Purchased tab and click the Purchase Application button. Provide the accessKey in the window to search for the application and submit the purchase request. Contact the application developer offline about the purchase request if needed. The application developer will then approve your purchase request and allocate the relevant application resources to you, after which you can find the application under the Purchased tab.