Configuring a Time Window Data Aggregation Pipeline
You can use the installed Time Window Aggregation template to quickly create a stream processing pipeline for aggregating the numeric type data of a single measurement point and assign the processed data to another measurement point on the same device.
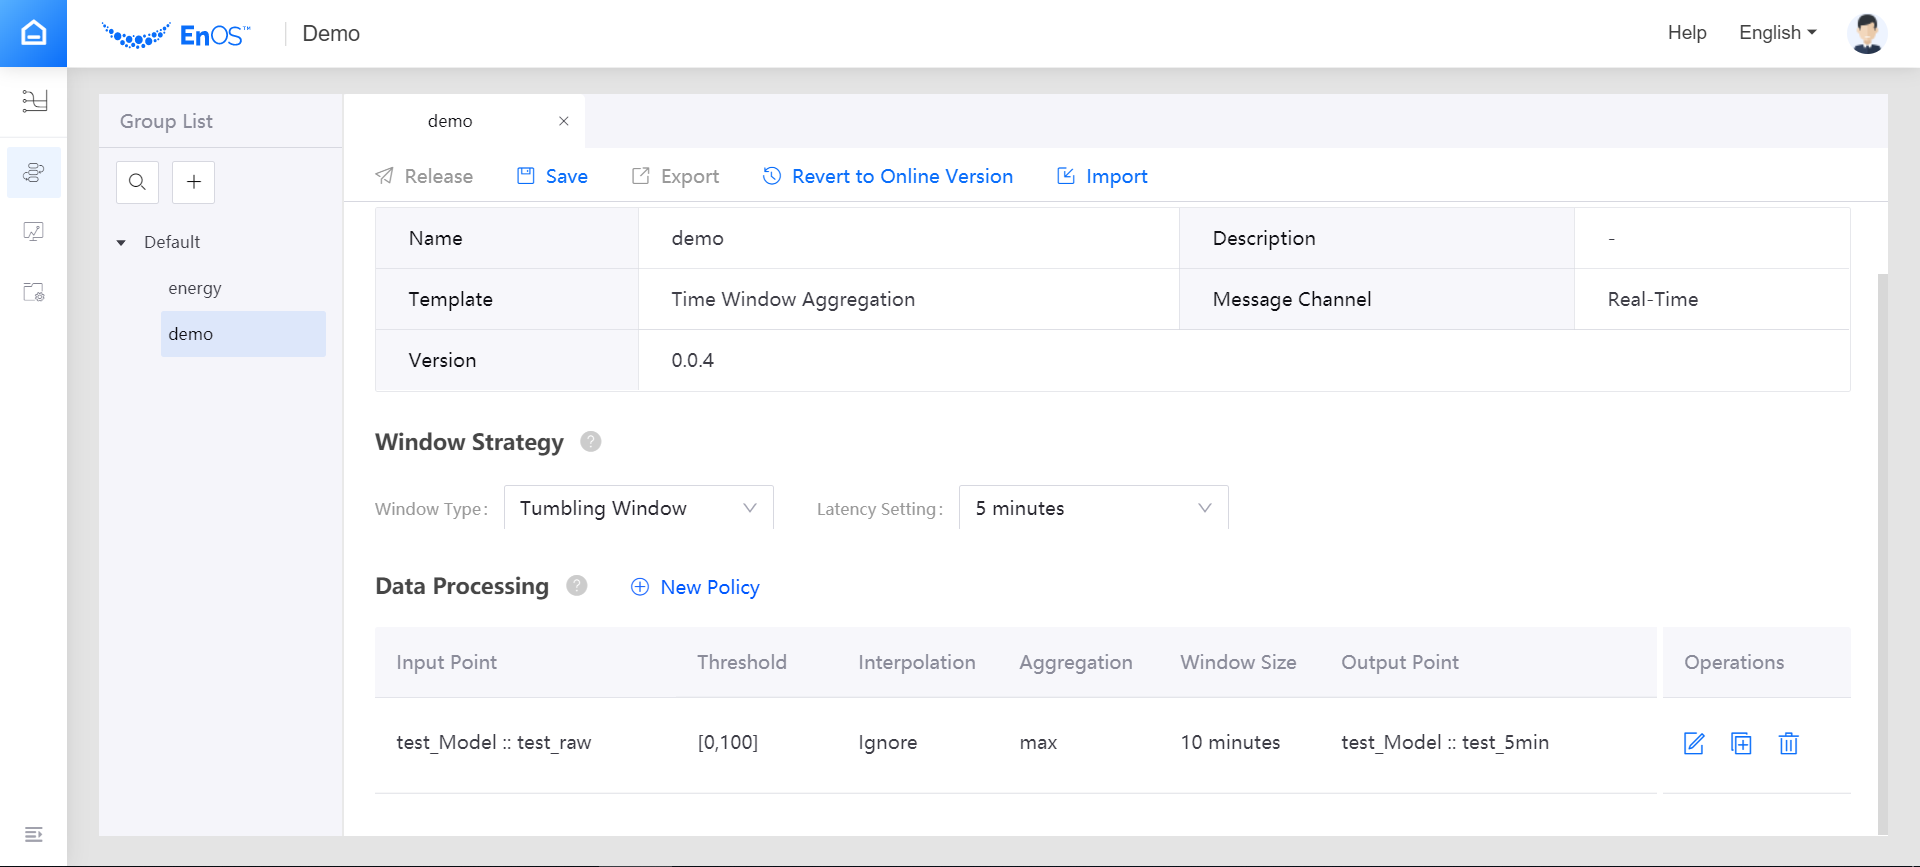
Setting Window Strategy
EnOS stream processing engine uses time window as the data processing mechanism. The configuration of data processing jobs depends on the type of time window selected. Windowing is simply the notion of taking a data source and chopping it up along temporal boundaries into finite chunks for processing (such as sum). You can configure the time window settings in the Window Strategy section:
- From the Window Type drop-down list, select Tumbling Window (EnOS stream processing engine currently supports Tumbling Window only).
- From the Latency Setting drop-down list, select the time extension for late/delayed data. If 0 second is selected, the late/delayed data will not be processed.
Configuring Data Processing Policy
In the Data Processing section, click New Policy to add an entry for a new data processing policy. Each processing policy will define the input point, output point, threshold, interpolation, window size, and aggregation method.
Click the Input Point field and select the model and measurement point that provides the input data to be processed. The data type of the measurement point must be numeric.
Click the Threshold field and specify the method and value to filter the input data. Data that exceeds the threshold will be processed by the interpolation algorithm.
Note
If the data of the input point is not raw data and the interpolation algorithm is Ignore, the specified threshold will not take effect.
Click the Interpolation field and select the interpolation algorithm that is used to revise the input data. Currently, the interpolation algorithm supports Ignore only. Data that exceeds the threshold will not be included in the processing.
Click the Aggregation field and select the function for computing data in the time window. The EnOS streaming processing engine currently supports functions such as
max,min,avg,sum, andcnt.max: Compare all valid record values in the time window and output the maximum value.min: Compare all valid record values in the time window and output the minimum value.avg: Calculate and output the average value of all valid record values in the time window.sum: Calculate and output the total value of all valid record values in the time window.cnt: Calculate and output the total number of valid record values in the time window.
Click the Window Size field and select a duration for the time window, which will determine the amount of data to be computed in a single window.
In sequential aggregation jobs like “a -> b -> c”, the window size of the job “b -> c” should be the same as that of job “a -> b” because “a -> b” will generate an intermediate output.
Click the Output Point field and select the measurement point to receive the processed results. After the input data is processed, the processed result is transferred to the output point, and an output record is generated. The timestamp of the output record is the start time of the time window.
Click the Save icon to save the data processing policy.
Note
- The output point and the input point must be of the same type.
- Ensure that the input point and output point belong to the same model.
- Avoid designing loops in a stream processing pipeline, like a -> b -> c -> a.
Managing the Data Processing Policy
You can perform the following general operations for the data processing policies.
- Add: Click New Policy to add a new entry. The stream processing pipeline configuration can be saved only when all the configurations are completed.
- Copy: Click the Copy icon
 of an existing policy to create a new policy based on it.
 - Edit: Click the Edit icon
 to edit the details of the policy.
 - Delete: Click the Delete icon
 to remove the policy.